Hello lovelies,
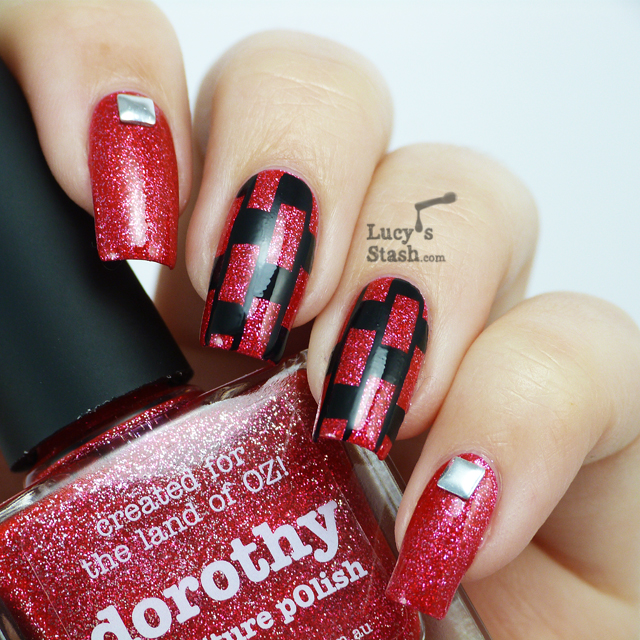
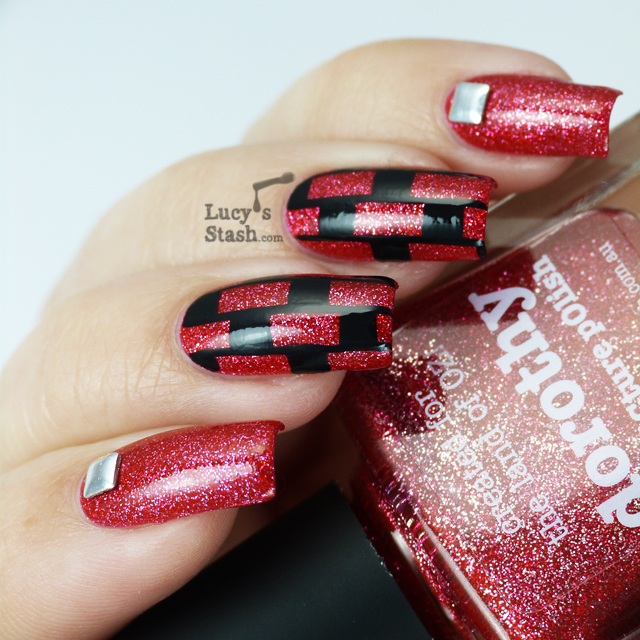
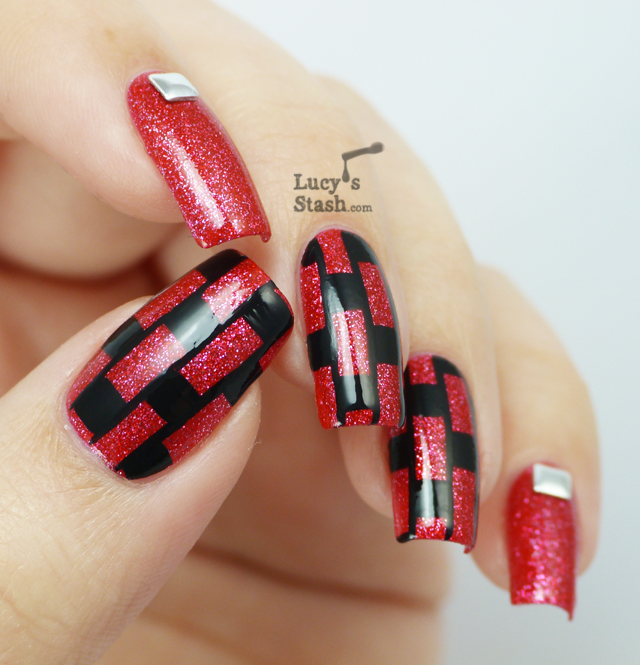
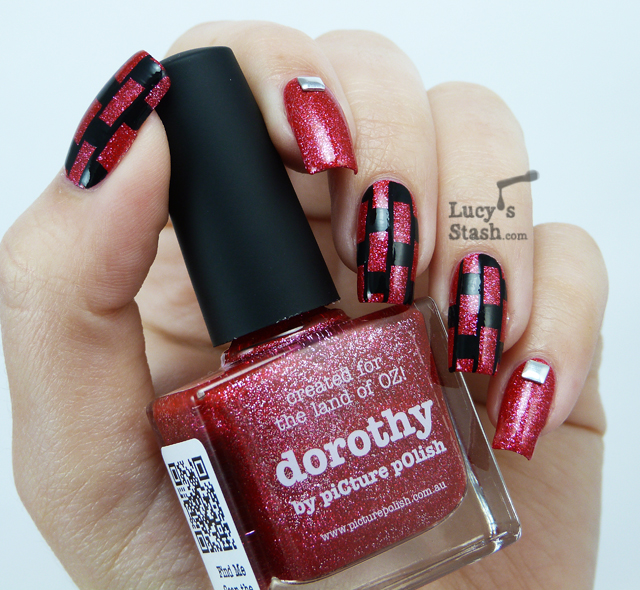
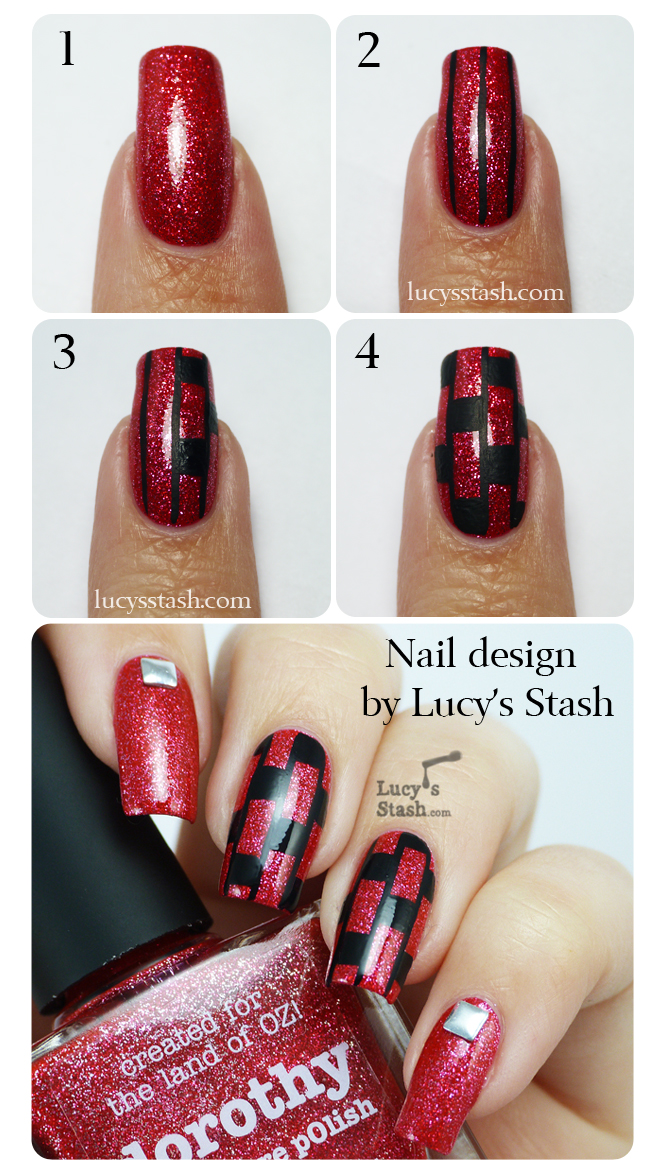
since it's still piCture pOlish Monday, I have here a nail art manicure over Dorothy (reviewed here). I've decided I'll post two posts every Monday - review post and nail art post :)
I have used two coats of Dorothy, black acrylic paint and metal studs.
The studs come from a stud wheel from Born Pretty Store which offers a great variety of shapes and sizes. You can use my 10% discount code when shopping at BPS, it's LHJ61.
And here is an easy tutorial so you can recreate this design! if you do please don't forget to tag me so I can see your work!
Check out the previous post to read the review of piCture pOlish Dorothy and where you can purchase.
Showing posts with label Red. Show all posts
Monday, 22 July 2013
piCture pOlish Monday: Review and swatches of piCture pOlish Dorothy
*PR sample
Hello lovelies,
Before I start a new series of Monday posts I'd like to announce, that I will be changing a platform from Blogger to Overblog this week which will force me to lose the Google Friend Connect widget so please make sure you follow me on some other platform like Facebook, email, Bloglovin' etc. all the link to my social networks are in the top right corner ;) The change will allow me to be more efficient and more active on all my social networks so I'll have more time to reply to comments and focus on other blog work! Back to today's post:
I've gotten an opportunity to review some of piCture pOlish shades so from now on the Mondays will be dedicated to them. If you don't already know, piCture pOlish is an Australian brand that brings many unique shades and it's sister brand is only freaking Ozotic! First polish I'll review is Dorothy...
Dorothy - strawberry red jelly base with magenta and silver glitter. It's a very pretty shade and I think it is great for Summer! I love how some of the glitter is half-sinked in the jelly base so it appears coloured. The finish is very sparkly in the sun and the polish looks gorgeous on toes.
The formula is opaque in two coats and it applied very well. It also dried fast but gritty so I needed a thick topcoat like Seche to smooth out the surface. Because it's glitter it lasted on me four days without chipping so good result :)
What a beauty, right? Stay tuned for a nail art post later today!
piCture pOlish is available at their website or at many international e-shops.
*PR sample
Labels:
Glitter,
Jelly,
piCture pOlish,
Red
Tuesday, 16 July 2013
Review of the new Bad Apple Cosmetics gel like polishes - Jelly Ruby Apple, Jelly Red Apple and Jelly Pink Apple
*PR sample
Hello lovelies,
Bad Apple Cosmetics, UK nail polish brand has introduced three new shades and I've been asked to share them with you!
About: "Yes its here! Bad Apple Cosmetics has developed a Gel Like Nail Polish opaque in 2 coats, leave the first coat for 8 mins. Second coat will dry a lot quicker, No UV lights no Bonds, and yes it last for up to 3 weeks. Bad Apple Jelly Pink Nail Varnish, 14ml is one of the exclusive and limited edition shades developed by Bad Apple and one of their collection of nail varnishes."
Jelly Pink Apple - bright pink leaning to coral.It's a lovely shade will suit most. The formula was a bit thicker and the brush was quite hard. I've experienced dragging when thinner coats were used. I needed to apply thicker coats to avoid the dragging and patches. The pigmentation was very good and two thicker coats provided perfect coverage. I've applied topcoat as well.
Jelly Red Apple - classic red creme. The shade is really nice, my kind of colour. I'm sorry to say that it wasn't very easy to work with. The formula was quite thick and fast drying so I needed to apply thicker coats fast to avoid patches. I've also had problems with bubbles as you can see. It might not have been entirely the problem of the nail polish but I haven't done anything differently so I really don't know why the bubbles occurred. Otherwise it dried glossy but I've applied topcoat to try smooth out the surface.
Jelly Ruby Apple - dark burgundy creme purple leaning to red. Is it dark purple or red? Looks like something in between to me but it a very pretty shade. It had the best formula out of all three polishes. It applied well despite the thicker formula and dried fast and glossy.
I really like the colours but I must admit the formula wasn't the easiest to work with. It showed every imperfection on my nails and was on thicker side. What's impressive though is Bad Apple's claim that the polish should last up to 3 weeks. Now, 3 weeks (even a week) is too long for me to wear one colour and I just don't have time to test it as I need to keep swatching so I can't verify this claim.But if you've tried these gel like shades let me know how they have lasted on you!
You can purchase Bad Apple polishes at the Cheap Smells website for really good prices or directly at the Bad Apple Cosmetics website. They also sell nail wraps so if you're into them check them out too!
*PR sample
Friday, 5 July 2013
SpaRitual Laugh Collection - Review and swatches
*PR sample
Hello lovelies,
Today I have the newest SpaRitual collection to show you and it's a very exciting one! No nude and earth tones but bold shades and glitters! The collection is called Laugh and has been released for Summer 2013.
Burst - red and pink glitter in a pink jelly base. This is a very pretty combo packed with glitter. It applied very well and I'm wearing two thicker coats. The tinted jelly nicely fills out any gaps but I can see my tips showing a bit. I needed thick topcoat to smooth the surface.
Hugs - blackened indigo blue with purple undertones. Absolutely stunning dark indigo blue! It might seem to be black but it really is not. The subtle blue shimmers shows under the light or in the sun. it applied very nicely and the pigmentation was excellent. One coat was almost enough but I needed two coats for perfect coverage. Short nails might need just one thicker coat.
Optimistic - muted matte white with beige undertones. Ok I don't know what I was thinking when I painted my nails but I put topcoat on *facepalm*. Without topcoat this polish dries nicely matte. I needed three coats for full coverage, two just weren't perfect. Otherwise it applied easily and dried fast.
Giggle - multi coloured glitter in a clear base. Fun glitter topcoat that will work with many colours. The bottle is loaded with glitter that applies well. There's plenty of it so I didn't have to worry about glitter placement. I'm wearing just one coat over Optimistic.
HA...HA... - silver and red glitter in a clear base.Oh I love this glitter topper! Rubies in the snow I say! It looks just perfect over Hugs and would look great over any dark colour. This is just one coat so you can see there's plenty of glitter in the bottle. It applied easily and dried fast.
Out Loud - teal jelly with blue, green and green holo glitter. Last but not least there's this gorgeous teal jelly packed with glitter it is on a sheer side so I've applied three thicker coats. It would be more efficient to layer it over teal polish but then you would loose the gorgeous layered jelly look. The drying time was a bit longer due to thick layers and I needed thick layer of topcoat to smooth the finish.
I like this collection a lot as it offers great variety of colours and finishes. SpaRitual collections have been quite bland lately (pastels or earth tones) so I am very much welcoming this fun Summer collection. The formulas varied a lot so please refer to each shades' separate review above.
My top picks are Hugs, Burst and HA...HA...
You can get these wherever SpaRitual polishes are sold and at:
UK: SpaRitual UK website,
US: SpaRitual US website
....and at FeelUnique
*PR sample
Thursday, 4 July 2013
Simple nail art design with Zoya PixieDust polishes
Hello lovelies,
I've had few request to do more nail art with textured polishes. This is really simple design to do, just follow my steps:
1. Paint your nails with base colour (Zoya PixieDust Godiva)
2. Paint a diagonal line from 3/4 of the nail towards the tip with red Zoya PixieDust Chyna.
3. Use dotting tool and paint dots with Godiva over the red.
4. Use Zoya PixieDust Dahlia and paint another diagonal line over the red polka dot part.
5. Let it dry properly and you're done!
I've used Zoya PixieDust Godiva, Dahlia and Chyna.
This is the middle step before applying Zoya Dahlia. I quite liked it but it wasn't enough :)
I've had few request to do more nail art with textured polishes. This is really simple design to do, just follow my steps:
1. Paint your nails with base colour (Zoya PixieDust Godiva)
2. Paint a diagonal line from 3/4 of the nail towards the tip with red Zoya PixieDust Chyna.
3. Use dotting tool and paint dots with Godiva over the red.
4. Use Zoya PixieDust Dahlia and paint another diagonal line over the red polka dot part.
5. Let it dry properly and you're done!
I've used Zoya PixieDust Godiva, Dahlia and Chyna.
This is the middle step before applying Zoya Dahlia. I quite liked it but it wasn't enough :)
Subscribe to:
Posts (Atom)